Sidemount diving

Sidemount is a scuba diving equipment configuration which has diving cylinders mounted alongside the diver, below the shoulders and along the hips, instead of on the back of the diver. It began as a configuration popular with advanced cave divers, as smaller sections of cave can be penetrated and tanks can be changed with greater ease. The same benefits for operating in confined spaces were also recognized by divers who conducted technical wreck diving penetrations.
Sidemount diving is now growing in popularity within the technical diving community for general decompression diving,[1] and is becoming an increasingly popular specialty training for recreational diving, with several diver certification agencies offering recreational and technical level sidemount training programs.[2][3][4]
Terminology

- Sidemount diving
- Sidemount diving is the, now increasingly formalized, approach towards conducting dives with 2 or more primary cylinders secured at the side of the body and in line with the torso – with no cylinders on the diver’s back.[5] A common feature that defines sidemount configuration is the use of bungee cords to provide an upper attachment on the cylinder valve, normally routed from behind the diver’s upper back, whilst the lower cylinder is secured to the diver’s lower harness (butt-plate or waist D-rings) via bolt-snaps.[6]
- Sidemounting stages
- Sidemount stages is the practice of using sidemount configuration (bungee loops and/or buttplate rails) as a means for stowing stage/deco cylinders in a streamlined manner against the sides of the torso, when otherwise diving in back-mounted doubles or CCR.[7]
- Monkey diving
- Monkey diving is the use of sidemount configuration/procedures, whilst only carrying a single cylinder. It is presented as an option on some recreational level sidemount courses (dependant on agency) and may also be a considered strategy for certain overhead-environment (cave/wreck) penetrations. The use of a single cylinder may require a strategy of counter-weighting to prevent diver instability in the water, depending on the buoyancy of the chosen cylinder.
- No-mount diving
- No-mount diving is a specialized overhead-environment strategy for dealing with particularly tight restrictions.[8] This may involve divers wearing a very basic harness under their existing configuration, or simply hand-carrying cylinders. Upon reaching a restriction through which they couldn’t otherwise pass, they will ‘strip down’ out of their primary gear, hand-hold or attach a cylinder/s to their ‘no-mount’ harness and move forwards.[8] A ‘no-mount’ harness can consist of nothing more than a weight-belt with several D-rings attached. The evolution of sidemount techniques and configurations has largely made this approach unnecessary, as a minimalist sidemount harness/BCD can be worn beneath back-mounted doubles, or even a CCR.
Benefits

Flexibility
The sidemount diving approach offers divers significant benefits to the flexibility of their approach. Unlike back-mounted doubles, acquiring and transporting sidemount suitable cylinders is often much more convenient and accessible. Sidemount diving configuration allows the travelling diver to conduct technical and/or overhead environment dives without having to source traditional back-mounted twin cylinders. When diving in remote locations, the transportation of diving cylinders, especially by hand, is considerably less physically taxing.[9][10]
Sidemount diving equipment is also considerably lighter, and less bulky than back-mounted alternatives – allowing for easier and cheaper (considering the rate of many airlines’ excess baggage costs) travel.
Accessibility
Unlike back-mounted cylinders, the sidemount diver has immediate access to, and observation of, the regulators and tank valves of their cylinders. This enables immediate problem identification and allows swifter resolution, without recourse to ‘behind the head’ shut-down drills that require a higher level of mobility, flexibility and freedom to operate.
Streamlining
Sidemount diving configuration places the cylinders under the diver’s armpits, in line with their body. This decreases water resistance (improving air consumption and reducing fatigue) whilst also allowing the diver to pass through smaller restrictions than would otherwise be possible in back-mounted cylinders. The flexibility to remove tanks, and propel them in front, allows the diver to pass through very small passages and holes when penetration diving – being limited only by the size of their bodies and exposure protection.[11] It is currently felt that where sidemount may be more streamlined, but with more surface area of the tanks exposed to water, there is more likely more drag for increased swimming effort.
Safety
Increased accessibility to life-supporting regulators, first-stages and valves improves efficiency and speed of critical cylinder shut-down procedures, allows immediate gas-loss identification and provides the diver with quick access to alternative safety procedures; such as regulator swapping (between cylinders), valve-‘feathering’ to access gas within a cylinder whose regulator is malfunctioned/free-flowing... or even breathing directly from a tank valve.
In addition, stowage of the cylinders next to the diver’s torso, and beneath his armpits, serves to protect vulnerable valves and regulator first-stages from collision, impact and abrasion damage, or accidental shut-down through contact with a ceiling. It also significantly reduces the risk of entanglement behind the diver, where it is least easy to rectify.
Comfort
Many divers will testify that sidemount diving configuration offers greater stability and easier-to-attain trim and control in the water. It is also less physically tiring to carry, and get into, sidemount equipment than with traditional back-mounted doubles – especially when operating from a small boat or a rough shore entry.[12]
The ability to attach, remove and replace cylinders whilst in the water allows the diver to avoid ever having to carry heavy-weight back-mounted cylinders. This is combined with reduced physical exertion when conducting regulator shut-down procedures, which is a major benefit to technical divers who suffer from shoulder or back discomfort or reduced mobility from old injuries.
Redundancy of gas
Whilst technical divers have always utilized a redundant gas system, either isolated-manifold or independent back-mounted cylinders, recreational divers have traditionally resorted to using ‘pony cylinders’ or ‘ascent bottles’ as contingencies against out-of-air emergencies. Whether attached to the primary cylinder, or slung at the chest, these cylinders often presented problems with stability and streamlining, whilst simultaneously only providing a bare minimum supply of air for emergency ascent.
Sidemount diving with two cylinders helps resolve stability and streamlining issues, and ensures that a truly capable redundant supply of air is maintained.
Technical divers debate the pros and cons of independent cylinders versus isolated-manifold doubles. Back-mounted manifold cylinders provide easy access to complete gas supplies, in the event of a regulator failure and shut-down. However, the manifold itself creates additional o-ring failure points and a failure in that component will deprive the technical diver of, at least, one-half of his remaining gas supply. Independent cylinders, when sidemounted, provide true gas redundancy, whilst offering access (via switching regulators between cylinders or feather breathing[13]) of all remaining gas.
Sidemount for the recreational diver

The benefits for cave diving and wreck diving with tight penetrations are largely accepted, but they are not so clear for the typical recreational diver.
Most recreational divers rely on their buddy for bailout gas, and do not carry a redundant gas supply. When there is only one cylinder, there is only no need to control several valves. The position of the cylinder valve behind the head has proven to be reasonably safe in millions of dives, though some divers do have physical difficulty reaching the valve while wearing the set, particularly if the cylinder is mounted relatively low on the harness.
In single cylinder diving there is seldom a reason to shut a cylinder valve while diving, and there is no need for changing cylinders or managing different gases. The recreational diver with a single cylinder is not supposed to enter low overhead spaces, so the single valve behind the divers head is unlikely to come into contact with objects which might roll it closed, as the diver tends to avoids situations where the head might impact with obstructions.
Since many recreational divers prefer to swim with their arms crossed in front of the chest, a side mounted cylinder might get in the way. Carrying one cylinder on one side does not increase stability or control, especially when it comes to a rough shore exit and other situations when freedom of movement of the arms is needed.
There are rarely any transportation benefits since the detached transportation of a back mounted cylinder is possible, and carrying the weight on the back is less stress on the spine than carrying it to one side when out of the water. Since backmount equipment designed for travelling is readily available, the weight advantages are unclear.
History
The 1960s - UK sump diving
The concept of sidemounting cylinders originated from cave diving in the UK, during the 1960s. During 'dry' explorations of Wookey Hole, the River Axe and other underground systems, divers occasionally encountered submerged passages that blocked further exploration. These cavers began incorporating scuba equipment specifically to progress beyond underwater areas. However, because they operated in very confined spaces, and most exploration remained primarily 'dry', they began experimenting and improvising with extremely minimalist configurations, minimising bulk, allowing cylinders to be easily removed and replaced, and retaining the capacity to squeeze through the tightest restrictions.[10][14]
The nature of these 'dives' in cramped sumps did not prioritize the need for buoyancy control or underwater propulsion – so the bare minimum needed was a mask, a cylinder, a regulator, a method of attachment to the body and, only on rare occasions, a set of fins.[8]
Many of these early sump explorers adopted an approach based upon a sturdy belt, with attached cam-band, that allowed a cylinder to be dropped in and carried alongside the outer thigh. This allowed them to crawl, or wriggle, through the dry cave sections, whilst presenting a secure method of attachment for passing through submerged areas.[8] Swimming efficiency, reduced water resistance, trim and buoyancy control were not generally required due to the nature of those caves. At the time, this approach to 'wet' cave exploration was generally called the 'English System'.[15]
The 1970s - Florida
During the 1970s the 'English system' began to be incorporated by American cave divers, operating in Florida.[8] Those cave systems were predominantly 'wet' and involved prolonged swimming with SCUBA; thus more emphasis was paid towards developing the diving performance of the system, in particular buoyancy and trim. Divers required buoyancy control devices for extended fining and began shifting the location of the cylinders from against the thigh, up to the armpit and against the torso.
These exploratory level cave divers began by making their own systems, using and adapting 'off-the-shelf' SCUBA equipment for their needs or creating configurations ‘from scratch’, based upon webbing harnesses and improvised bladders for buoyancy.
The 1990s - release of first commercial rig
In the mid-1990s Lamar Hires designed the first commercial sidemount diving system and this was manufactured by Dive Rite. Dive Rite focused on the newly released 'Transpac' harness.[16] Other cave divers continued to manufacture their own DIY configurations.
At this time, the use of sidemounted configuration was primarily restricted to a small number of exploration-grade cave pioneers.
The 2000s - cave diving popularity and sidemount evolution
In 2001 Brett Hemphill designed the Armadillo Side-Mount Harness. The Armadillo innovated several features that would be utilized in many future side-mount harness designs ; Butt anchoring rear attachment pad, Cylinder bungee attachment located under the wing, cylinder bungee location straps for quick location of bungees and primary BCD inflation located at the bottom of the harness instead of the top.[17] Widespread popularity of sidemount diving systems did not truly emerge until the mid-2010s, when the growing popularity of technical and cave diving became exposed to sidemount proponents on the internet who were offering an alternative approach that matched the minimalism and functionality of the popular 'DIR/Hogarthian' back-mounted systems, whilst offering advantages in flexibility, comfort, accessibility and – highly debated online – safety.[18]
The increasing interest in sidemount diving configurations prompted several manufacturers and individuals to design and sell their own designs of a sidemount system. Hollis, OMS, UTD developed equipment, while Steve Bogaerts (a UK-born cave pioneer, who lives and cave-dives in Mexico) released the very popular 'Razor' system and began teaching a specific model training program for his rig.
At this time, several technical scuba agencies developed formal sidemount training programs and incorporated sidemount diving configuration as an equipment option within existing technical diving programs.
When PADI instructor, Jeff Loflin,[19] devised a distinctive sidemount diving speciality course, it proved extremely popular, being replicated by many PADI technical-level instructors. This soon led to PADI devising standardised sidemount diving programs at both recreational and technical levels, making sidemount a viable and mainstream option for both recreational and technical divers. Other agencies, such as ANDI, IANTD, SSI, TDI and UTD also incorporate sidemount training at varied levels.
Distinctive schools of design
British / Mexico Cave
A typically minimalist and lightweight approach, generally used with aluminum cylinders. Most popular with warm-water/wetsuit and travelling divers. Most often seen in Mexican cave systems. This is the evolution from sidemount pioneers who initially used lightweight hydration bladders (i.e. MSR) for their buoyancy requirements, with a basic harness for cylinder and weight attachment.
- Harness
- A 'hogarthian' inspired, bare webbing harness, using separate shoulder and lumbar plates.
- Lower cylinder attachment
- D-rings on the rear waist-belt,
- Upper cylinder attachment
- Continuous and loop bungees,
- Wing shape
- Triangle, diamond or box bladders (lift focused over the hips, less up the torso)
- Example rigs
- Razor 2.0, XDeep Stealth, UTD Z-Trim , Aquamundo, Diamond, Hollis Katana
- Influential proponents
- Steve Bogearts, Steve Martin, Gary Dallas
American / Florida Cave
These are the robust 'big rigs', generally used with steel cylinders. Most popular with cold-water sidemount divers in the USA and Europe. Most often seen in Florida cave systems. This is the evolution from sidemount pioneers who initially used home-converted BCDs/wing systems, typically in response to a higher buoyancy requirement from using steel cylinders/higher weighting needed for colder water exposure protection.
- Harness
- Typically an in-built harness to the BCD, with quick-release buckles and adjustments.
- Lower cylinder attachment
- Butt-plate with rails
- Upper cylinder attachment
- 'Old-school', independent and ring bungees,
- Wing shape
- Donut and horseshoe bladders (lift distributed evenly up the torso)
- Example rigs
- Armadillo, DiveRite Nomad, Hollis SMS100, Hollis SMS75, Halcyon Contour
- Influential proponents
- Lamar Hires,Woody Jasper,Mark Long,Wes Skiles, Edd Sorensen
Configurations
Various harness/BCD configurations have been used to sidemount cylinders. The choice between different configuration approaches is typically determined by the nature of the diving undertaken (open water, technical, wreck or cave) and by the divers' existing equipment, financial budget and whether they have a preferred approach to diving philosophy (minimalist, DIR, Hogarthian, etc.). The size/ material/ volume of diving cylinders to be used also has a large impact on sidemount BCD requirements.[8][20]
Backplate and wing harness adaptation
Rigid Hogarthian style backplate and wing BCD systems may be modified by adding butt-plates, bungee cords and optional special sidemount buoyancy compensators. Cylinders are supported at the valve end by bungee loops that run from the backplate to the front chest D-rings. The lower cylinder clip attaches to D-rings mounted on the waist belt or 'rails' on a butt plate.
Sidemount divers who conduct penetration diving in confined overhead environments (wreck diving or cave diving) will generally prefer a soft fabric backplate,[21] or webbing harness only, owing to the risk of a solid backplate becoming stuck in a small restriction.
An example of a commercial backplate and wing harness adapter, including integrated butt plate and attachment points for bungee loops, is the OMS Profile.[22]
Specialized and hybrid harnesses
Specialized sidemount harnesses are available 'off-the-shelf' commercially.[23] Some of these are designed specifically for sidemounting only, but others are 'hybrid' designs, enabling the diver to swap between sidemount and back-mounted cylinders, as needed.[8]
Examples of dedicated sidemount rigs:
- Hollis SMS50 [24]
- Razor 2 [25]
- DiveRite Nomad LT [26]
- XDeep Stealth 2.0 [27]
- Golem Gear A2 and S [6]
- UTD 'Z-system' [28]
Examples of hybrid sidemount rigs:
- Hollis SMS100 or SMS75 [29]
- OMS Tesseract [30]
- DiveRite Nomad XT or EXP
- Custom Divers Rhino [31]
- White Arrow S-Wing [32]
Some manufacturers now provide sidemount rigs targeted for recreational diving use. These are typically variants of existing dedicated sidemount rigs, with the low pressure inflator (LPI) mounted at the top of the BCD (rather than at the bottom corner) for an 'over the shoulder' configuration more familiar to diver's transitioning to sidemount from a traditional BCD.
Examples of dedicated recreational sidemount rigs:
 Hybrid (sidemount/backmount) harness. Front view
 Hybrid (sidemount/backmount) harness. Back view
 Adapted Wing sidemount BCD (32 lb donut wing/OMS Profile) with soft backplate (Oxycheq Travel-Lite).
 Adapted Wing Sidemount BCD (rear view) with OMS Profile sidemount-adapter in on a 32 lb single-tank donut wing.
 View of Apeks sidemount harness from the back of the harness showing the buoyancy compensator.
 Inside view of Apeks sidemount harness showing weight pocket, the harness webbing and buoyancy compensator.
Minimalist webbing harness

A webbing harness with shoulder straps, waist belt and crotch strap, supporting a variety of sliders and D-rings for attachment of cylinders and accessories, with or without integrated weighting or separate weight belts, and with or without a back mounted buoyancy compensator, which may be attached to the harness, or directly to the diver. Cylinders are usually attached to a shoulder or chest D-ring and waist belt D-ring on each side. Additional accessories may include canister lights and clip-on pockets for small equipment. This style of harness may be off the shelf from an original equipment manufacturer or retailer,[35] or home made, as most of the parts are freely available or relatively simple to make.
Belt style 'Sump' harness
In the UK, cave diving was an additional skill learned by cavers to explore flooded parts of a cave system, rather than divers choosing to explore caves. The early equipment was little more than cylinders fitted with belt loops and slid onto the standard caver's belay or battery belt along with any extra weights needed to achieve neutral buoyancy, and a caver's belt mounted battery pack.[36] This simple sidemount configuration was particularly low profile and suited to small cylinders, and worked well for low visibility, usually fairly shallow dives, which were often more of a crawl or wriggle though tight confines than a swim.
As penetration distances into caves increased, the basic belt was replaced by a more sturdy harness with shoulder straps and padding on the waist band to distribute the load more comfortably.
A disadvantage of this arrangement is that the cylinders and lead weights must be fitted to the harness before it is put on. This usually required the diver to lie down to fit the harness, and if the cylinders were large, to be assisted to a standing position.
 Belt loop on cylinder for sidemounting in the British cave diving style
 Diving cylinders set up for British cave diving sidemounting
 The original belt style British sidemount harness, with cylinders, weights and battery canister mounted.
 A diver putting on his belt style sidemount harness. Getting up afterwards often required assistance.
 A diving cylinder ready for use on a British cave diving sidemount harness.
 Back view of the modified British sidemount harness.
 Front view of the modified British sidemount harness.
 Front view of the modified British sidemount harness with cylinders.
 British cave diving style sidemounting harness, side view, with cylinders, weights and battery pack
 British cave diving style sidemounting harness, side view, with cylinders, weights and battery pack
 Helmet used for British style cave diving.
 Simplified British cave diving sidemount harness, front view.
 Simplified British cave diving sidemount harness, back view.
 Simplified British cave diving sidemount harness, side view.
Equipment
Cylinders


- Cylinder
- Cylinders of varying sizes and materials can be used for sidemount diving. The optimum choice of cylinder will be determined by the water conditions and/or choice of exposure protection used.
- Regulator set
- Each primary sidemount cylinder requires a regulator 1st stage, a regulator second stage and a submersible pressure gauge (SPG). The left hand cylinder will also include a low-pressure inflator (LPI) for BCD inflation. If a drysuit is used, the drysuit inflator will be attached to the right hand cylinder. The most common regulator configuration mimicks hogarthian regulator set-up, with a long (5–7 foot) hose on the right cylinder and a short hose on the left cylinder, where the regulator is contained in a bungee necklace.[37][38] However, some sidemount divers prefer an opposite configuration, two long hoses or two short hoses.
- Cylinder straps
- Sidemount cylinders are secured to the diver's butt-plate or rear harness D-rings via a cam-band or worm clamp to which a bolt-snap is attached via cord. The placement of the cam-band/worm clamp along the cylinder length is determined by characteristics needed to ensure cylinder trim in line with the diver's torso. The upper cylinder may be secured directly via the bungee strap, or by using a choker into a ring-bungee configuration.
- Choker (#1)
- A simple loop of sturdy nylon cord (often 440 cord) secured around the cylinder neck. A double-ended bolt-snap can be removed and replaced as required, or a single bolt-snap can be permanently attached. The purpose is to provide additional cylinder security and stability when conducting water entries with the sidemount cylinders in place. [8] It can also be used as an emergency attachment, should the bungee fail.
- Choker (#2)
- A small strap around the neck of a sidemount cylinder used to pull the bolt-snap closer to the cylinder neck. Primarily used in conjunction with the DiveRite 'Ring Bungee' mounting method; this has the effect of constraining the top of the cylinder to lie closer to the shoulder of the diver for a lower profile.[39][40] The choker is passed through the jaw of the snap and tightened, then the clip is clipped to the bungee which is clipped to the shoulder D-ring, allowing the clip to slide along the bungee.
Bungees
The use of bungees for upper cylinder attachment and trim is a quintessential identifier of true sidemount configuration. The bungee is attached to the rear upper harness/BCD and routes under the diver's armpits to the front shoulder webbing. Appropriate length and thickness bungees are criticl to ensure that the sidemount cylinders remain in trim horizontally along the diver's side torso with the valves under the armpits. The cylinder/s should neither rise above, or drop below, the diver when they are in flat, horizontal trim position. The cylinder is secured by wrapping, or routing, the bungees around the cylinder valve handle, stem and/or cylinder neck. In addition to providing proper cylinder positioning and trim, the bungees also provide the capacity to secure the cylinder to partially detach the cylinders at the bottom and maneuver them into a forward position.
- Double Independent Bungee
- This method utilizes two lengths of bungee, typically attached to the rear of the harness/BCD via stainless steel quick-links. They may attach via dedicated D-rings on the diver's BCD or a 'daisy chain' length of looped nylon webbing that permits easy adjustment of bungee length/fit.
- Continuous Bungee
- This is a single length of bungee cord, routed from one shoulder D-ring to the other, via the rear of the diver and under the armpits. It is also a popular method of 'back-up' or reserve bungee, that is carried in the diver's pouch and deployed in case the primary bungee fails during the dive.
- Old School Bungee
- This method uses a double strand of bungee is secured at the rear through a strip of horizontal webbing. The bungees route under the arms and are secured to the shoulder D-rings via bolt-snaps.
- Loop Bungee
- An evolution of the old school bungee, the loop bungee is a double strand of bungee that is secured to the rear harness and runs under the armpits. It is secured to the shoulder harness via a fixed, smaller, loop of bungee tied through a triglide retainer.
- Floating Loop Bungee
- (also known as the sliding loop bungee) This is a derivative of the basic loop bungee, except the smaller loop on the shoulder harness is free-floating. The attachment is typically just a small loop of bungee tied directly around the shoulder harness webbing.
- Ring Bungee
- The 'Ring Bungee' introduces a metal ring along the bungee length (in the armpit area).[8] This permits the use of a choker to connect tanks to the ring, making bungee wrapping of the cylinder valve/neck unnecessary. A popular configuration has the bolt snap connected to a ring by a quick link, with a length of bungee from the ring to another quick link which is used to connect the assembly to a D-ring on the back of the harness. The bolt snap is clipped to the shoulder D-ring and the cylinder neck bolt snap is clipped to the ring. The choker is used to minimise the distance the cylinder top can dangle away from the ring bungee.
Sidemount Buoyancy Bladders
Sidemount systems provide buoyancy through a wing-style bladder that is located behind the diver. These bladders are typically designed according to one of two concepts;
- Triangular, Diamond or Box Shaped Bladders
- This design of bladder owes its heritage to the early use of MSR hydration bags converted for diving buoyancy. The concept maximizes buoyancy provision over the hip area, with little or no buoyancy held on the upper back. The bladder is normally attached at the top to the shoulder plate or spine webbing; and at the base to the waist-belt webbing. They are often 'wrap-around'in design and some use lengths of bungee for connection around the divers stomach area and through the crotch. Notable examples are the Razor 2.0, XDeep Stealth and UTD Z-Trim.

- Donut or Horseshoe Bladders
- This design of bladder concept stems from sidemount pioneers who converted jacket-style or wing BCDs for use as homemade sidemount systems. The buoyancy provision runs along the entire back area. These bladders typically provide greater buoyancy capacity than the triangular style designs. Notable examples are the Armadillo, DiveRite Nomad and Hollis SMS100.
Sidemount Accessories
- Cutting devices
- Sidemount divers, particularly those operating in overhead environments will carry two or more cutting devices. These should be stowed where they can be easily accessed, even when in a tight passage. Popular stowage locations include; a sheath mounted on the harness or lower arm. Redundant/back-up devices may be carried in a pocket.[8] Short bladed (often titanium) knives, trauma shears or emergency line cutters are the most popular selections for primary and back-up cutting tools.
- Lights
- Sidemount divers who enter overhead environments will typically carry a primary torch, often of umbilical/canister design, along with one or two back-up torches. Specific sidemount umbilical/canister torches are now sold, with a 90 degree junction for the umbilical which permits them to be mounted on the butt-plate or upper-rear crotch strap. Back-up torches are typically a robust LED design, with a battery/burn life indicated to be 2-3x that of the planned dive duration.
- Reels and spools
- Sidemount divers will typically carry one or more reels/spools. In open-water these may be used for deployment of delayed surface marker buoys (DSMB). In overhead environments, these will include a primary guideline and safety/jump spools - in like with cave or technical wreck diving protocols. These are typically attached to the diver on rear D-rings, normally on the butt-plate or rear waist strap, to prevent them dangling below the diver.
- Line arrows and markers
- Sidemount divers in overhead environments will carry a selection of directional (arrows) and non-directional (cookies) line markers. The use of Referencing Exit Markers (REM) is also becoming popular with sidemount divers.[41]
- Helmet
- Helmets are particularly popular with sidemount divers, as they provide a convenient mounting point for primary and/or back-up lights. The primary function of the helmet remains to provide head protection in overhead environments. Sidemount configuration can mean that the more typical method of mounting back-up lights below the diver's shoulder D-rings becomes less favorable. This area is more heavily loaded with bungee and deco stage attachments, reducing access to back-up lights stowed from the D-ring. Mounting primary lights on the helmet can be advantageous as it frees up the hands in very confined spaces and/or when heavily task-loaded with other equipment. The draw-backs to helmet mounted lights are that it can increase the risk of snagging the helmet on obstructions and an increased potential to inadvertently dazzling dive buddies.[8] Sidemount divers may choose to make their own helmet by adapting an existing climbing, kayaking or skate-boarding helmet, or purchasing an off-the-shelf cave/sidemount diving helmet.
 Home constructed sidemount helmet with GoPro video camera and back-up/video lights attached.
 Sidemount helmet with bungee strap
 Technical diver with sidemount helmet, pre-dive.
- A pocket is useful for carrying small accessories and spares. A small nylon pouch which clips, via double-ended bolt-snaps onto the rear D-rings has the advantages of streamlining, while permitting easy access to the contents by removing or replacing the pouch as necessary.[8]
Training
Level 1: "Recreational (Rec or Basic Sidemount)"
Basic sidemount training is offered by most agencies, and aims to develop initial equipment familiarity and operation. At this level, students are taught to adjust, fit and operate the sidemount rig, whilst diving with one or two cylinders maximum.[37][42]
These training courses then develop core diving skills that are specifically relevant to sidemount equipment usage – namely: equipment set-up, diver and cylinder trim, buoyancy control, alternative propulsion techniques and cylinder handling in the water. Many basic courses also teach supplementary diving skills, such as DSMB deployment and variations on open water skills, such as inverted (upside-down) fining and inverted mask-clearing. Knowledge development covers topics such as: gas management, dive planning and equipment considerations/options.

Level 2: "Technical (Tec or Tech Sidemount)"
Technical (sometimes called 'advanced') sidemount courses develop higher level sidemount skills with a focus on technical decompression diving with 3+ cylinders. A higher level of equipment proficiency and diving skill is required; as additional deco cylinders will be added to the rig, enabling mixed-gas and accelerated decompression procedures to be conducted.
These training courses generally require the student to be already certified as a technical diver (when crossing over from a backmount tech qualification), or the student first learns tec sidemount as a prerequisite for completing further technical decompression training in sidemount configuration.
Level 3: "Advanced (Overhead Cave/Wreck Sidemount)"
The highest level of sidemount courses develop sidemount skills specifically for demanding penetration dives in the overhead (cave/wreck) environment. These courses are focused on maximizing the benefits of sidemount for passage through restricted and confined areas; and also teach multiple stage (additional tanks of bottom gas) diving techniques.
Access to courses at this level is typically reserved for fully qualified cave or technical wreck sidemount divers, who have significant experience and skill.
Procedures
One of the advantages of the sidemount system is the easy access to cylinder valves, and the protected position they occupy in comparison with most back mount systems, where the valves are relatively vulnerable to bumping against an overhead and being "rolled off" (closed by rubbing against the overhead).
The standard arrangement for sidemount is that all cylinders are independent, and each is provided with a single demand valve, an SPG, and on one or two, a low pressure inflator hose for buoyancy compensator and, if used, the drysuit. This implies that if gas is shared in an emergency, the recipient will be breathing from a different cylinder to the donor, unlike the more usual arrangement with backmount, where both divers breathe off the same set.
In the case of recreational sidemount, with only one cylinder, the regulator would have an octopus demand valve for air sharing and the procedures would revert to much the same as for a single back mount cylinder.
Gas management
The sidemount diver typically operates two independent tanks for 'bottom gas' during a dive. Compared with back-mounted double cylinders and an isolation manifold, the use of independent cylinders requires additional gas management skills. The sidemount diver has to swap regulators at planned intervals to ensure that the use of gas is balanced from both cylinders - thus ensuring good balance and trim in the water, whilst preserving a sufficient supply of air for emergency sharing.[43]
As of 2013, the only sidemount system offering a manifold system is the UTD ‘Z-Manifold'. This equipment provides a link between cylinders and dispenses with the need to swap regulators and balance tanks. In all other instances, the sidemount diver will follow a gas management strategy, which enable roughly equal consumption of gas from both sidemount cylinders and retains a necessary minimum reserve in both cylinders to enable an air-sharing exit/ascent from the dive.
The basic principle of breathing gas management is never to run out of suitable breathing gas while underwater. The implications depend on the team size and the dive profile, and range from very simple for a situation where the diver can make a safe free ascent at any point of the dive, to complex, when a team of two or three divers is constrained from surfacing immediately by decompression obligations or a hard overhead, and rely on each other for emergency gas supply at any point of the planned dive, particularly when a variety of gases are carried which are each only suitable for a specific depth range.
It is standard practice to allow for the possibility of total failure of gas supply from any one cylinder at any point of the dive, and to turn the dive if the gas supply is compromised beyond the planned limits.
Rule of thirds and gas reserves
Most technical and overhead-environment divers will maintain the rule of thirds as the least conservative option when diving sidemount. Because air-sharing will remain a possibility while a second diver is present, it is considered good practice that both cylinders retain independent reserves of sufficient gas for both divers to reach the surface safely from any point in the planned dive. one third of the capacity of the cylinder is considered a simple rule of thumb reserve sufficient for most circumstances, but there are times when it is not enough and times when it will be more than enough.
The principle of the rule of thirds is that one third of the gas supply is available for the penetration, one third for the return and one third is a reserve which allows for gas sharing on the return. Therefore the dive is turned when either cylinder drops to two thirds of total capacity.
It is not safe practice to drain one cylinder, retaining the entire reserve in the other, in case of a catastrophic failure of the second cylinder supply. Sidemount divers are trained to maintain a roughly equal balance of gas supply in each primary cylinder throughout the dive. This ensures that they always retain an equal reserve of gas for donation to an out-of-gas diver; and also helps preserves their stability and lateral trim by maintaining equal buoyancy characteristics in the tanks on either side of their body.
- Incremental Regulator Switching
- This is the primary method taught to sidemount divers for balancing the gas in their cylinders. It involves switching between the left and right side regulators are pre-determined increments of pressure. The smaller the increment, the closer the match of pressure between primary cylinders. Typical increments might be 30bar (metric) or 500psi (imperial).
- Swapping after 1/6
- A less used method of maintaining cylinder balance is to swap regulators for every 1/6 cylinder gas consumption. This would mean each regulator was breathed from twice, before reaching the gas turn-point (2/3) and a further two switches on each regulator until the reserve (1/3) was reached.[44]
- Swapping after 1/3
- The sidemount diver could also opt to switch regulators with every 1/3 gas consumed (on each cylinder). This would mean each regulator was used once, before reaching the gas turn-point (2/3) and once more, per regulator, before reaching reserve level (1/3). This method does not promote a fine cylinder buoyancy balance across the torso.
Regular regulator switching also helps to confirm that both left and right-side regulators remain fully functional. Overhead environment divers find this an especially prudent measure when sidemount diving through restrictions in high silt and muddy conditions.
Critical skills
The following represents a summary of the critical skills taught by a spectrum of agencies at various sidemount diving levels:[45][46]
Level 1: "Recreational (Rec or Basic Sidemount)"
- Equipment configuration and assembly
- Pre-dive safety checks
- Attaching tanks on land and at the surface (shallow and deep water)
- Descent procedures
- Trim and buoyancy
- Propulsion techniques – frog kick, modified flutter kick, back kick, helicopter turn
- Gas planning and management (independent cylinders)
- Regulator switching
- Air sharing - donor and receiver
- Tank positioning and adjustment for continual good trim
- Removal of single tank while swimming
- Removal of two tanks while swimming
- Inverted and/or vertical mask clearing
- DSMB deployment ascent procedures
Level 2: "Technical (Tec or Advanced Sidemount)"
- Equipment configuration and assembly
- Stage bottle configuration and assembly
- Water entry procedures
- Descent procedures
- Trim and buoyancy
- Propulsion techniques - frog kick, modified frog and flutter kick, back kick, helicopter turn, finger walking, pull and glide
- Sidemount diving mobility – inverted propulsion, rolls, loops etc.
- Gas planning and management, including decompression gasses
- Team drills and development
- Guideline/penetration contingency drills
- Sidemount regulator shut-downs
- Feather breathing from a shut-down free-flowing regulator [13] (Manipulating the valve to temporarily supply air from a shut-down cylinder as you breath).
- Swapping regulators between cylinders underwater
- In-water stage bottle attachment, removal and replacement
- Sidemount decompression procedures
- Practice of all sidemount skills (Level 1 & Level 2) within specific over-head environment (cave/wreck)
Compatibility in mixed configuration team diving
The basic sidemount configuration requires different techniques for sharing gas, compared to the isolation manifolded twins back mount configuration.[47] This means that a single set of standardised safety procedures is not possible while diving with team members using back mounted tanks.
The UTD Z-system provides an approach to emulate back mounted Hogarthian configuration by quick-connecting two primary gas supply sidemount cylinders to a manifold block mounted behind the shoulders on the Z-system harness, from which long hose primary and necklace secondary demand valves are supplied, reducing the demand valve arrangement to a functional approximation of the standard Hogarthian configuration at the expense of additional complexity of components.[47][48]
The added failure points may not be necessary when using more than one bottle at the time. Additional stage cylinders are side mounted with independent regulators.
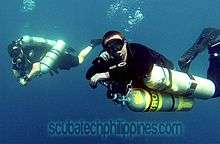
 Sidemount diver in fairly tight space
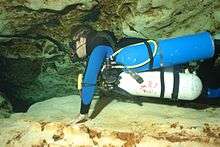 Left side view of sidemount diver in cave
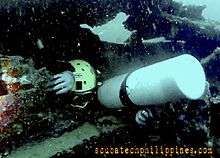
 Top view of sidemount diver
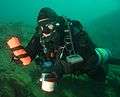 Sidemount diver front view. Holding reel and DSMB
- Sidemount diver: detail of top of cylinder
 Sidemount diver in cave showing 2 cylinders and BC back view
References
- ↑ "PADI launches new Tec Sidemount Diver course". Diverwire. 5 March 2012. Retrieved 18 August 2012.
- ↑ Hires, Lamar (Summer 2010). "Sidemount – Not Just For Cave Divers Anymore". Alert Diver Magazine. Retrieved 18 August 2012.
- ↑ "PADI puts full weight behind sidemount diving". Diver Magazine. 6 June 2010. Retrieved 18 August 2012.
- ↑ "Holy Sidemount!". X-Ray Magazine. 25 April 2010. Retrieved 18 August 2012.
- ↑ Liddiard, John (June 2012). "Stage or Sidemount - What's the Difference?". Diver Magazine. Retrieved 18 August 2012.
- 1 2 "Golem Gear, Inc. - Armadillo Sidemount Exploration Harness A2". Golemgear.com. Retrieved 18 August 2012.
- ↑ Bowen, Curt. "CCR Sidemount - Stage Configuration for Exploration". Advanced Diver Magazine. Retrieved 18 August 2012.
- 1 2 3 4 5 6 7 8 9 10 11 12 Kakuk, Brian; Heinerth, Jill (2010). Side Mount Profiles. High Springs, FL: Heinerth Productions. ISBN 978-0-9798789-5-4.
- ↑ Davis, Andy. "Sidemount Diving Course Notes, Chapter 2". Sidemount Diving Course Notes. Scuba Tech Philippines. Retrieved 18 August 2012.
- 1 2 Bogaerts, Steve (2010). "Why Sidemount" (PDF). GUE Conference Presentation. Retrieved 18 August 2012.
- ↑ "Side-Mount Diving". Sport Diver Magazine. 29 June 2010. Retrieved 18 August 2012.
- ↑ "Sidemount Workshop – a matter of comfort". X-Ray Magazine. 15 January 2010. Retrieved 18 August 2012.
- 1 2 "Tec Sidemount Instructor Guide". Professional Association of Diving Instructors. June 2012.
- ↑ Davis, Andy. "Sidemount Diving Course Notes". Sidemount Diving Techniques. Scuba Tech Philippines. Retrieved 18 August 2012.
- ↑ Ryall, Dave. "Cave Diving British Style". Sidemount Diving Techniques. Cave Diving Group (CDG). Retrieved 18 August 2012.
- ↑ "TransPac XT". Dive Rite. 2015. Retrieved 7 April 2015.
- ↑ "Armadillo sidemount harness". Advanced Diver Magazine. Retrieved 12 January 2015.
- ↑ Martin, Steve (January 2012). "Sidemount Diving - The Next 'Big Thing' in British Diving". Sport Diver Magazine. Archived from the original on 7 May 2013. Retrieved 18 August 2012.
- ↑ Loflin, Jeff. "Technical Scuba - Sidemount Diving".
- ↑ Neto, Rob (4 March 2012). "Choosing A Sidemount Rig". Chipolata Divers. Retrieved 19 August 2012.
- ↑ "Oxycheq Ultra Lite Backplate". Oxycheq. 18 August 2012. Retrieved 18 August 2012.
- ↑ "OMS Profile Sidemount System". Big Blue Technical Diving News and Events. 25 November 2009. Retrieved 18 August 2012.
- ↑ Davis, Andy. "A List of Current Sidemount Diving Systems". Scuba Tech Philippines. Retrieved 28 November 2013.
- ↑ Cooper, Tony (23 April 2012). "Underwater Explorers: The Hollis SMS 50 review 2012". Underwaterexplorers.blogspot.com. Retrieved 18 August 2012.
- ↑ "Go Side Mount Shop. Manual for the Razor Harness 2". Shop.gosidemount.com. Retrieved 18 August 2012.
- ↑ "Sidemount diving, Nomad sidemount system, sidemount training, Dive Rite scuba". Diverite.com. Retrieved 18 August 2012.
- ↑ "ProTec Dive Center Sidemount Diving - Sidemount Harness". Protecsidemount.com. Retrieved 18 August 2012.
- ↑ "Z-Harness". Retrieved 2 November 2012.
- ↑ "SMS100 Sidemount Harness Manual" (PDF). Hollis Gear. Retrieved 18 August 2012.
- ↑ "Seaduction - Field Test: OMS Sidemount Systems". Seaduction.com. 5 March 2011. Retrieved 18 August 2012.
- ↑ Pat (1 April 2012). "Custom Divers Rhino revealed". British Diver. Retrieved 18 August 2012.
- ↑ "HLBdive White Arrow Sidemount Wing". hlbdive.com. Feb 2013. Retrieved 6 Feb 2013.
- ↑ DiverWire. "HOLLIS to Unveil new SMS50 SPORT Sidemount System at DEMA Show". DiverWire. Retrieved 25 February 2013.
- ↑ "Dive Rite Releases Sidemount BCD For Ocean Diving". Diverwire. Retrieved 25 February 2013.
- ↑ Bogaerts, Steve (31 August 2011). "Go Side Mount". Go Cavern Diving. Retrieved 18 August 2012.
- ↑ Price, Duncan (4 April 2005). "Rebreather". Sump4.com. Retrieved 18 August 2012.
- 1 2 "Sidemount Instructor Guide". Professional Association of Diving Instructors. March 2012.
- ↑ Jablonski, Jarrod (21 March 1997). "Hogarthian Gear Configuration". originally posted to rec.scuba by Carl Heinzl on 21 March 1997. Retrieved 25 February 2013.
- ↑ Hires, Lamar. "Sidemount Scuba Diving Nomad Tank Chokers: Dive Rite". DiveRite84. Retrieved 26 February 2013.
- ↑ Hires, Lamar. "New Nomad Tank Attachment". DiveRite. Retrieved 26 February 2013.
- ↑ Philips, Bil. "Cave Explorer and Cave Instructor Bil Phillips introduces the REM". www.gosidemount.com. Retrieved 25 February 2013.
- ↑ Davis, Andy. "Sidemount Diving Course Notes, Chapter 5". Sidemount Diving Course Notes. Scuba Tech Philippines. Retrieved 18 August 2012.
- ↑ Davis, Andy. "Sidemount Diving Course Notes, Chapter 8". Sidemount Diving Course Notes. Scuba Tech Philippines. Retrieved 18 August 2012.
- ↑ Neto, Rob (4 March 2012). "Sidemount Gas Management". Chipolata Divers. Retrieved 19 August 2012.
- ↑ Davis, Andy. "Sidemount Diving Course Notes, Chapter 10". Sidemount Diving Course Notes. Scuba Tech Philippines. Retrieved 18 August 2012.
- ↑ Rockwood, Kelly (27 October 2011). "Testing the new PADI Sidemount Diver Course". PADI TecRec Blog. Retrieved 19 August 2012.
- 1 2 "Z-Side-Mount System". UTD International. 5 April 2012. Retrieved 18 August 2012.
- ↑ Jablonski, Jarrod. "The Hogarthian Gear Configuration". Jeff Bentley. Retrieved 13 October 2008.
Further reading
- Heinerth, Jill (2012). Side Mount Profiles. Heinerth Productions Inc. ISBN 978-0979878954.
- Hartmann, Alexander (2014). Sidemount Guide. epubli GmbH. ISBN 9783737502962.
External links
- Sidemount Diving Techniques
- http://www.simplysidemount.com
- http://www.gosidemount.com
- http://www.diveph.com
- http://www.sidemount.com.au
- http://www.deeptecthailand.com
- http://www.sidemountscubadiving.com
- http://chipoladivers.com/category/sidemount/
- http://scubatechphilippines.com/scuba_blog/sidemount-2/