Operation Protea
| Operation Protea | |
|---|---|
| Part of the South African Border War | |
| Location | 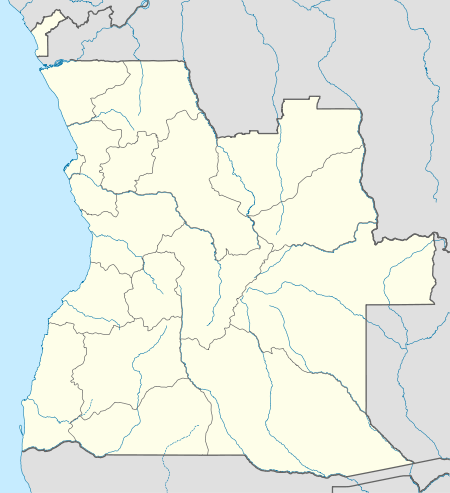 Xangongo Ongiva Cahama Operation Protea (Angola) |
| Objective | To destroy SWAPO's military forces and logistical supply lines in the central theatre of southern Angola at Xangongo and Ongiva by means of ground and air operations. |
| Date | 23 August – 2 September 1981 |
Operation Protea was a military operation during the South African Border War and Angolan Civil War in which South African Defence Forces (SADF) destroyed a number of South West Africa People's Organisation (SWAPO) bases in Angola. During the operation, which took place from 23 August to 4 September 1981, up to 5,000 SADF soldiers occupied Cunene province, Angola.[1]
Planning
Operation Protea was launched on 23 August 1981. Its objectives were to destroy the SWAPO command and training centre at Xangongo and its logistic bases at Xangongo and Ongiva.
Xangongo, located at 16°44′57″S 14°58′28″E / 16.7491°S 14.9745°E was the headquarters of SWAPO's "north-western front" from where it directed SWAPO units operating primarily in the Kaokoland and in western and central Ovamboland. There were also other SWAPO bases, which were used as supply depots and training bases for SWAPO recruits, sited to the south and southeast of the town.
Ongiva, a town located less than fifty kilometres north of the Angola-South-West Africa border at 17°04′06″S 15°43′34″E / 17.0682°S 15.7262°E, was an important SWAPO logistical and personnel centre which supported operations in central and eastern Ovamboland and in the Kavangoland.
Both Xangongo and Ongiva were key bases in supporting SWAPO's war effort in South-West Africa, because of their location close to its border. Their destruction would undermine SWAPO's ability to conduct operations in their "north-western front" and also have a psychological impact by reinforcing the message of Operation Reindeer to SWAPO that it no longer had the luxury of sanctuaries in southern Angola.
Order of Battle.[2]:169[3][4]:Chp7[5]:123


South African forces
Brigadier Rudolf Badenhorst – Overall Commander
Task Force Alpha
Colonel Joop Joubert – TF Commander
Battle Group 10 – Commandant Roland de Vries
- one Mechanised infantry company – 61 Mechanised Battalion
- one Parachute company
- one Armoured car squadron
- one Mortar platoon
- one 140mm artillery troop
- one combat engineer troop
Battle Group 20 – Commandant Johan Dippenaar
- one mechanised infantry company
- two motorised infantry companies
- one armoured car squadron – two Ratel-90 troops and two Eland-90 troops
- one medium artillery troop
- one 81mm mortar platoon
- one field engineer troop
- one assault pioneer platoon
- two Protection platoons
Battle Group 30 – Commandant Chris Serfontein
- three motorised infantry companies – National service units
- one armoured car squadron – Eland-90
- 120m mortar battery – 43 Light Battery
- 81mm mortar platoon
- Field engineer troop
- two protection platoons
Battle Group 40 – Commandant Deon Ferreira
- three motorised infantry companies – 32 Battalion
- one armoured car squadron – Eland-90
- 120mm mortar battery – 41 Light Battery
- four anti-tank teams
- two protection platoons – 1 Platoon from B company of 202 Battalion and 1 other platoon
Combat Team Mamba (Mobile Reserve) – Commandant Johnny Coetzer
- one mechanised company – 61 Mechanised
- one anti-tank platoon – Ratel-90 – 61 Mechanised
- two Ratel 60 sections
- 140mm G-2 artillery troop – 1 Medium Battery (4 Field Regiment)
Task Force Bravo
Colonel Vos Benade – TF Commander
Battle Group 50 – Commandant Frans Botes
- four motorised companies – 201 Battalion
- 81mm Mortar platoon
Battle Group 60 – Commandant James Hills
- three motorised infantry companies – 32 Battalion
- one 81mm Mortar platoon
Mobile Reserve – Commandant Johnnie Coetzer
- 1 Parachute Battalion – two companies and one pathfinder platoon
- 52 Reconnaissance Regiment – one special forces team
Battle Group 30
- detached from TF Alpha
Battle Group 40
- detached from TF Alpha
Angolan forces
11 Brigade based at Ongiva and is the district headquarters
- two infantry battalions
- two anti-aircraft battalions – 23mm guns
- one tank company – T-34
- one armoured-car company – BTR-23
- one artillery battery – 82mm and 76mm guns
19 Brigade based at Xangongo with elements at Humbe and Peu Peu
- two infantry companies
- one tank company – T-34
- one armoured car squadron – BTR-23
- one artillery battery
- three 122mm rocket launchers
- seven anti-aircraft guns
21 Brigade
- based at Cahama
Soviet military advisors
- based at Xangongo and Ongiva
SWAPO forces
- Xangongo – 500 SWAPO regulars and 500 semi-regulars
- Between Cahama and Humbe – one SWAPO battalion
- Ongiva – SWAPO headquarters
Battles – Task Force Alpha
On 23 August, the SADF units left the bases and headed towards the Angolan border. On the night of 23 August, Battle Group 10 would cross at Ruacana while Battle Groups 20, 30 and 40 would cross at Ombalantu.[5]:129 A South African special forces team was placed in position to begin monitoring the Cahama/Xangongo highway for any enemy reinforcements.[2]:171 The same day the SADF left their bases, the South African Air Force (SAAF) launched a strike with various aircraft against air-defence targets in Angola at Cahama and Chibemba.[5]:129[6]:Chp7 This was called Operation Konyn.
Humbe
Battle Group 10 crossed into Angola at Ruacana just before midnight on 23 August and headed northwards through dense bush to their forming point which was 12 km north-west of Humbe.[7]:437 They arrived at their form-up point on time despite encountering obstacles not shown on their maps.[7]:443 At this point they found that H-Hour had been moved back one hour to 11h30 due to the eastern battle groups of Task Force Alpha encountering navigation problems on their march to Xangongo.[7]:442 Commandant de Vries divided his force into two combat teams, one of Ratel-20s, Ratel-90s and 81mm mortars in the attack group and the second team as a mobile reserve of Buffels and Eland-90's, with the 140 mm artillery in the rear.[7]:446 As Battle Group 10 followed the road south-east to Humbe, the SAAF began to bomb the town of Xangongo. The group's artillery began firing 140 mm artillery rounds at Humbe but was informed by their aerial spotter plane that the trenches close to the town seem abandoned and nor was there any enemy to the battle group's rear in the direction of Cahama. The artillery fire was ceased and their alternative target at Techiulo, that was closer, was then taken without incident as FAPLA soldiers fled on seeing the battle group arrive, leaving behind a group of Irish Catholic nuns at the mission station in the village.[7]:449–50 By 12h30 the group was heading back towards Humbe passing by the empty trenches and sighting no fleeing enemy from Xangongo, entered the empty town of Humbe.[7]:451 They soon left the town and positioned themselves within 3 km of the bridge over the Cunene River and Xangongo. The two combat teams of Ratel-20's and paratroopers were then sent closer to the river and began to encounter contact with FAPLA troops fleeing Xangongo.[7]:452 By dusk the river plain was under the battle group's control and they laagered there overnight though sporadic fire could be heard overnight from Xangongo.[7]:456 Apart from being woken and called to arms when a FAPLA column attempted a break-out from Xangongo via the bridge, this was taken care of by the other battle groups and they were stood down and rest of the night was peaceful for Battle Group 10.[7]:459 On 25 August, after gathering up enemy equipment on the river plain, Battle Group 10 crossed the bridge over the Cunene river and by 09h00 they were in Xangongo.[7]:460 There mission would be to hold the town, protect the task force from FAPLA to the north-west while the other battle groups pursued their objectives in the south-east.
Xangongo
Battle Group 20, 30 and 40 crossed the border at Ombalantu into Angola just before midnight on 23 August and headed northwards through dense bush.[5]:129 Battle Group 40 led the way followed by 20 and 30 but was slower moving and the other groups who could not overtake to increase the pace towards the forming point.[5]:129 This was due to the fact the Buffel troop carriers were slower than the Ratels.[2]:171 By 09h15 on 24 August, these battle groups found themselves too far east due to a navigation error and lost time.[5]:129 After correcting their error, the air attack on Xangongo was pushed back by one hour to 12h00.[5]:129 The three battle groups would find their way to their forming-up point west of the town and waited for the air and artillery attack. The air attack on Xangongo began at 11h50 when four Buccaneers from 24 Squadron attacked installations and anti-aircraft sites with AS-30 missiles, one hitting a barracks while the other three failed to hit the targets due to malfunctions.[6]:Ch7 At 11h54, five Canberra bombers (12 Squadron) dropped bombs, followed by dive bombing by three further waves of 8 Mirage F-1AZs (1 Squadron), 6 Mirage F-1CZs (3 Squadron) and 4 Mirage IIICZs (2 Squadron).[6]:Chp7 The last wave of rocketing was carried out by eight Impalas finishing at 12h10.[6]:Chp7 Then followed a twenty-minute artillery barrage of the town's defensive positions by G-2 guns and Valkiri multiple rocket launchers.[2]:171
Battle Group 40 was tasked with taking the town of Xangongo, its defences and the bridge over the Cunene. The plan was to attack from two places, the north-east with Combat Team 41 and the south-east with Combat Team 42, and this began around 12h50.[2]:171 The teams began to assault the layers of trenches and bunkers that made up the town's defences.[5]:130 The fort and water tower, key targets in the town, were eventually reached and taken. The bridge was reached by the combat teams by 17h30 and was immediately prepared with demolition charges by the engineers.[4]:Chp7 It was found later that FAPLA and PLAN officers and their Soviet advisors had hurriedly fled the town while FAPLA and SWAPO soldiers held their positions and fought furiously.[5]:133 Battle Group 40's task of mopping up in Xangongo was completed on 25 August and would now be attached to Task Force Bravo which was operating to the east against PLAN bases, setting out for the town of Evale after 26 August.[2]:174
Battle Group 20 was tasked with the southern end of the town and its airfield to the west.[2]:171 The first trenches reached by the battle group around 13h25 were found to be empty but as they advanced further, they began to receive small arms fire and then more serious fire from 23mm anti-aircraft guns.[5]:130 Battle Group 20's attack on southern Xangongo was now held up by ZU-23-2 AA guns and the advance was halted as air strikes were called. Two attacks by Mirage aircraft an hour later failed to destroy the site and a third attack by artillery was not successful either.[5]:130 Captain Laubscher of 42 Squadron , flying an observation aircraft, had fired smoke rockets to narrow the Mirages' attack, but this failed so he decided to attempt a direct hit with smoke rockets to accurately mark the target for the Mirages.[5]:132 He dive bombed the target firing one smoke rocket directly into the gun position but by this time the Mirages were out of ordnance and fuel.[5]:132 It was later found that his smoke rocket had hit the operator of the gun.[5]:132 Laubscher was awarded the Honoris Crux decoration for bravery.[8] Two and a half hours later the ground attack had resumed this time receiving limited enemy ZU-23-2 fire, attacking bunkers and trenches and eventually taking the airfield.[5]:133 By 18h00, Battle Group 20 was in control of its objectives, having destroyed at least four tanks and capturing vehicles, guns and ammunition.[2]:171 Battle Group 20's rest overnight was disturbed by an enemy truck column that advanced from the south into the group's positions and was destroyed by Ratel 90s. By the midday on 25 August, the battle group was in control of all positions south of the town but lost one soldier in the process.[5]:134 Later, Battle Group 20 would attack a PLAN base to the south of Xangongo towards Cuamato but this was found to be abandoned except for equipment.[2]:174
On 25 August, after gathering up enemy equipment on the river plain, Battle Group 10 crossed the bridge over the Cunene river and by 09h00 they were inside Xangongo.[7]:460 Now based at Xangongo, Battle Group 10 was allocated to protect Task Force Alpha from a FAPLA counterattack from Cahama towards Xangongo.[7]:468 It was also tasked with protecting the bridge and ensuring it was ready for demolition when required.[7]:468 The paratroopers attached to this battle group were sent to seek out PLAN positions further north of Xangongo but all the bases were found to be abandoned.[7]:463[5]:135 Meanwhile the pathfinder group which had been operating around Peu-Peu was attached to the battle group.[7]:464 Combat Team 3 was commanded by Major Joe Weyers and would position itself close to Chicusse about 18 km south-east from Cahama on 25 August. If contact with FAPLA took place, then the plan was to stop FAPLA's movement or fight a delaying action back to Xangongo.[7]:469 The combat team would consist of three armoured car troops of Ratel and Eland 90s, platoon Ratel-60s, one Ratel-20 Mechanised infantry platoon, troop of 4 G-2 artillery pieces, engineer section, an unmanned aerial vehicle and 44 Parachute Brigade's pathfinder group with Colonel Jan Breytenbach.[7]:468 The combat team advanced north-westwards and took up positions across the Cahama/Xangongo highway with the pathfinders on the flanks to the south and guns in the rear.[7]:470
Around 22h20, the artillery troop reported eight enemy vehicles heading for the combat team's rear from the south-east. The enemy artillery unit, consisting of a BTR-152 APC, BM-21 MRL's and 23 mm AA guns, passed into the combat team's laager and was ambushed and destroyed with the SADF taking three wounded and capturing two BM-21s.[7]:471–2 Mopping up continued on the morning of 26 August but around sunrise, the team was fired on by FAPLA 122 mm rockets that failed to hit their position.[7]:472 On 27 August, Combat Team 3 was recalled to Xangongo and then sent westwards of the town as a stopper group close to Catequero.[7]:473
Two troops of Ratel-90s were later withdrawn from Combat Team 3 the same day and attached to Combat Team 2 and sent towards Ongiva via Mongua as a reserve and joined up with Battle Group 30 around 13h00.[7]:482 Combat Team 2 would return to Xangongo from Ongiva by 16h00 on 28 August.[7]:485 On 29 August, Combat Team 2, replaced Combat Team 3 as the stopper group and the former returned to Xangongo for rest.[7]:487 Later that day Combat Team 2 would be recalled too, as Battle Group 10 had received orders to return to SWA/Namibia on 1 September and preparations were required to return with the captured enemy equipment.[7]:487 On the same day Combat Team Mamba disbanded and their units rejoined Battle Group 10 and became the stopper group until 31 August.[7]:487–88 Combat Team 3 escorted an artillery group to a position north-west of Mucope on 30 August.[7]:488 The artillery group fired on Cahama but on their return to Xangongo, they discovered an FAPLA battle group close to Mucope and after the combat team received reinforcements from their battle group, they attacked only to find the FAPLA forces had retreated to Cahama.[7]:488 On 31 August, Xangongo and its bridge was handed over to UNITA and their SADF military intelligence liaison Commandant Mo Oelschig and headed for Ongiva via Mongua, collecting the remains of the Alouette that had been shot down 25 August.[7]:500 After spending the night at Ongiva, the underground fuel tanks at the airfield were destroyed and by 1 September, Battle Group 10 was back at base in South-West Africa/Namibia.[7]:501
Peu-Peu
On 24 August, at 11h05, anti-aircraft sites at Peu-Peu were attacked by four SAAF Impalas using rockets.[6]:Chp7 At 11h45, attacks were continued by four Buccaneers which fired four AS-30s with only three striking a barracks.[6]:Chp7 Battle Group 30 advanced to a position north-east of Xangongo and found that the FAPLA troops, tanks and artillery at Peu-Peu were preparing to support their troops in Xangongo.[5]:133 The South African battle group attacked first and after a short fight forced FAPLA to flee the town, destroying tanks, artillery and personnel carriers.[5]:133 Unable to mop-up in the town as night fell and with reports of enemy to the west, the South Africans would capture it by the following morning.[2]:171 FAPLA left behind up to 300 tons of ammunition, 120,000 litres of diesel and 90,000 litres of petrol.[5]:133 Battle Group 30 would then release a combat team to back up Battle Group 20 which had thrown in its reserve in Xangongo.[5]:133 Battle Group 30 was back in Xangongo on 26 August and joined Battle Group 20 for the advance to positions north of Ongiva and the attack planned for 27 August.
Mongua
Combat Team Mamba was tasked with taking the village of Mongua east of Xangongo on 25 August.[7]:480 This was a precursor to an attack on Ongiva on 27 August by Battle Groups 20 and 30. FAPLA maintained a mechanised force including tanks around the village whose size had been underestimated.[7]:480[5]:136 The combat team attacked first with Valkiri rockets but soon encountered enemy trenches, 14.5mm anti-aircraft guns and 76mm artillery that held up the infantry attack and so Ratel 90s and Ratel 60 mortar teams were deployed to silence the guns.[5]:136–7 The infantry was then released to attack and clear the trenches.[5]:133 The team's Ratel 20s and 90s soon overran the village, destroying several T-34 tanks and forcing FAPLA to flee towards Ongiva.[7]:480[5]:138 The SAAF lost two men when their Alouette III helicopter was shot down by 14.5mm anti-aircraft guns while providing fire support for the combat team.[5]:137 Combat Team Mamba would now wait until the following day to be joined by the two battle groups for the attack on Ongiva.
Ongiva
On 27 August, Battle Group 20 was tasked with the attack on the airfield at Ongiva while Battle Group 30 was tasked to attack the town itself. Battle Groups 20 and 30 departed Xangongo on 26 August, leaving the town under control of Battle Group 10, and followed the road east to Mongua.[7]:480 There Combat Team Mamba, which had taken the town the day before, joined them and would act as the two battle groups' reserve during the attack on Ongiva.[7]:481 They then headed south-east to their assembly point north of Ongiva in preparation for the attack at 07h00 on 27 August.[7]:481 The SAAF had made a pamphlet drop on the town warning civilians and FAPLA to leave as the South Africans' fight was with PLAN, but 11 Brigade was instructed to stay and defend.[7]:481 PLAN was ordered to strike the SADF in the rear but appeared to take no part in the battle during the following days.[5]:139
The SAAF would open the attack on the morning of 27 August with the first rocket attack by two Mirage IIIs against anti-aircraft positions north of the runway at Ongiva.[6]:Chp7 One of these Mirages was struck by a SA-7 missile but made it back to its base in SWA/Namibia with serious tail damage.[6]:Chp7 The second rocket attack at 07h45 by four Mirage F-1AZs on anti-aircraft positions close to the airport also drew anti-aircraft fire from SA-7s and 57 mm guns without any hits.[6]:Chp7 A third rocket attack at 07h48 by four Mirage IIIs hit targets close to the town. The fourth rocket attack at 07h52 by four Mirage IIIs hit targets close to the town, drawing anti-aircraft fire and SA-7s with no hits.[6]:Chp7 08h00 saw another attack, this time by five pairs of Canberra and Buccaneer bombers dropping bombs north of the town but on the wrong target which still seemed to silence some anti-aircraft positions.[6]:Chp7 Six Mirage F-1AZs dropped airburst bombs on the airfield at 08h10 and the last attack at 08h15 was on 11 Brigade headquarters by six Mirage F-1AZs using airbursting bombs.[6]:Chp7
After bombarding the targets with artillery fire, Battle Group 20 set off for targets in and around the airfield.[5]:139 Battle Group 20 was divided into four combat teams. Combat Team 50 was the reserve, while Combat Team 10 hit targets south of the airfield, Combat Team 20 attacked targets south-east of the airfield and the last team 30 directly at the airfield and its installations.[5]:139 Combat Team 10 encountered 23mm anti-aircraft guns at its target and cleared them with artillery and infantry attacks.[5]:139 A counterattack by at least three T-34s was beaten off by Ratel-90s with two tanks destroyed.[5]:139 FAPLA then fled their positions.[5]:139 Combat Team 20 took the enemy positions by 15h30 but was slowed by 23mm anti-aircraft guns and RPG-7s until mortars and infantry cleared the positions.[5]:140 Combat Team 30 attacked the airfield from the south-east and east-west along the runway.[5]:140 The team met fierce fighting from FAPLA infantry and anti-aircraft guns and all movement forward by the SADF was held up for two hours despite artillery fire. The use of mortar fire against a water tower helped stop the guns receiving information on the South African positions and the airfield was taken around 14h00 with FAPLA fleeing.[5]:140 With Battle Group 20's control of the airfield, it secured Battle Group 30's flank for its attack on the positions in and around the town of Ongiva.[5]:141
Battle Group 30 began its attack on the town defences but its advance was slowed by minefields and heavy resistance.[5]:141 Reports came in of the sighting of T-34 tanks from the east.[5]:141 The commander summoned additional anti-tank armour and Battle Group 10 detached Combat Team 2's Ratel-90 troops which were hastily sent to Ongiva, arriving around 13h00.[7]:482 In the meantime they attempted to slow the tanks' advance by attacking them with 120 mm mortars which had had no effect.[5]:141 Combat Team 2 went into action immediately but by the time action commenced, dusk was falling and they fired only to discourage the tanks advance.[5]:141 As night fell, all that could be seen was the flashes from the tanks and when all the Ratels fired on the position, they succeeded in destroying two tanks and ending further enemy attacks.[5]:141 Battle Group 30 then pulled back and laagered for the night, readying themselves for an attack the next day.[5]:141 On 28 August, Battle Group 30 resumed their attack on Ongiva only to find the FAPLA defences, equipment and town abandoned.[5]:141 By 12h08, Ongiva was under South African control[2]:175
Also on the morning of 28 August, a FAPLA convoy was discovered fleeing northwards from Ongiva towards Anchanca by a company from 32 Battalion which was attached to Battle Group 60.[2]:175 It called in a SAAF airstrike of Mirages and Impalas which attacked the convoy followed by an attack by Alouette gunships.[5]:142 They succeeded in destroying tanks, trucks and armoured personnel carriers.[5]:142 As the 32 Battalion company moved into to mop up, they discovered the bodies of four Russians, two Soviet officers and two civilian women.[5]:142 One soviet soldier, Warrant Officer Nikolai Feodorovich Pestretsov, was captured when he remained behind with his wife's body.[5]:142 It was later discovered that thirteen Soviet military advisors had died that day.[5]:142
Battle Group 20 would begin to garrison the town, but with civilians beginning to ransack it later on 28 August, by 29 August they attempted to restore order by distributing captured food and clothing and tried to help restore utilities to the town with the help of the remaining civil servants.[5]:149 30 August saw Battle Group 20 begin to prepare the captured equipment for its return to SWA/Namibia while other elements of the battle group patrolled the road from Ongiva through Namacunda to Santa Clara, clearing it of mines as this would be the route the battle groups would take to leave Angola.[2]:175 By 31 August, Battle Group 30 was detached from Task Force Alpha and was attached to Task Force Bravo, which was conducting operations against PLAN bases to the north-east of Ongiva, and sent to the town of Anhanca.
Aftermath
By 2 September all units were back in SWA/Namibia and Battle Group 10 resumed being called 61 Mechanised Infantry Battalion while the other battle groups disbanded.[5]:142 Soviet casualties stood at thirteen: nine officers and four civilians, while one soldier was captured.[5]:142 South African casualties included 10 dead and 64 wounded.[5]:143 PLAN and FAPLA casualties were high with 831 dead and 25 captured.[5]:143
The following equipment, said to be between 3,000 and 4,000 tons, was captured:[5]:143
- 6–9 T-34 tanks
- 3–4 PT-76 tanks
- 4 BRDM-2 APC
- 2 BM-21 MRL
- 25–43 ZIS-3 76 mm guns
- 16 ZU-23 AA guns
- 17 14.5 mm AA guns
- 13 M-55 20 mm AA guns
- 94–97 SA-7
- 240 trucks
- 1,800 small arms
- 250 tons ammunition
- 490 000 lt petrol
- 120 000 lt diesel
The end of Operation Protea did not signal the end the South African activity against SWAPO in southern Angola as Operation Protea was quickly followed up by another attack, Operation Daisy.
References
- ↑ Manning, Susan A. (1999). Modern Dance, Negro Dance: Race in Motion. p. 17.
- 1 2 3 4 5 6 7 8 9 10 11 12 13 Nortje, Piet (2004). 32 Battalion : the inside story of South Africa's elite fighting unit. Cape Town: Zebra Press. ISBN 1868729141.
- ↑ 61 Mechanised Battalion Veterans Group http://www.61mech.org.za/operations/7-operation-protea
- 1 2 Wilsworth, Clive (2012). First in Last Out. The South African Artillery in Action 1975 – 1988. Solihull, England: Helion & Company Limited. ISBN 9781908916853.
- 1 2 3 4 5 6 7 8 9 10 11 12 13 14 15 16 17 18 19 20 21 22 23 24 25 26 27 28 29 30 31 32 33 34 35 36 37 38 39 40 41 42 43 44 45 46 47 48 49 50 51 52 53 54 Scholtz, Leopold (2013). The SADF in the Border War 1966–1989. Cape Town: Tafelberg. ISBN 978-0-624-05410-8.
- 1 2 3 4 5 6 7 8 9 10 11 12 Lord, Dick (2012). From Fledging to Eagle. The South African Airforce during the Border War. Solihull, England: Helion & Company. ISBN 9781908916624.
- 1 2 3 4 5 6 7 8 9 10 11 12 13 14 15 16 17 18 19 20 21 22 23 24 25 26 27 28 29 30 31 32 33 34 35 36 37 38 de Vries, Roland (2013). Eye of the Storm. Strength lies in Mobility. Tyger Valley: Naledi. ISBN 9780992191252.
- ↑ Louw, Martin & Bouwer, Stefaan (1997). The South African Air Force at War. p. 179
Further reading
- Lord, Dick (2012). From Fledging to Eagle. The South African Airforce during the Border War. (Kindle ed.). Solihull, England: Helion & Company. ISBN 9781908916624.
- Nortje, Piet (2004). 32 Battalion : the inside story of South Africa's elite fighting unit. Cape Town: Zebra Press. ISBN 1868729141.
- Scholtz, Leopold (2013). The SADF in the Border War 1966–1989. Cape Town: Tafelberg. ISBN 978-0-624-05410-8.
- de Vries, Roland (2013). Eye of the Storm. Strength Lies in Mobility. Tyger Valley: Naledi. ISBN 9780992191252.
- Steenkamp, Willem (1989). South Africa's border war, 1966–1989. Gibraltar: Ashanti Pub. ISBN 0620139676.
- Wilsworth, Clive (2010). First in, last out : the South African artillery in action 1975–1988. Johannesburg: 30 ̊South. ISBN 978-1920143404.
- 61 Mechanised Battalion Veterans Group http://www.61mech.org.za/operations/7-operation-protea
| Preceded by Operation Klipklop |
Battles and operations of the South African Border War August to September 1981 |
Succeeded by Operation Daisy |