Convoy PQ 17
| Convoy PQ 17 | |||||||
|---|---|---|---|---|---|---|---|
| Part of Second World War, Arctic Campaign | |||||||
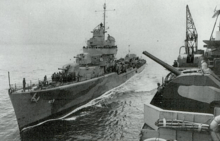
 Escorts and merchant ships at Hvalfjord May 1942 before the sailing of Convoy PQ 17. | |||||||
| |||||||
| Belligerents | |||||||
|
|
| ||||||
| Commanders and leaders | |||||||
|
|
| ||||||
| Strength | |||||||
|
6 destroyers, 2 anti-aircraft ships, 2 submarines, 11 smaller craft, 35 merchant ships 6 auxiliary ships[1] |
1 battleship (in port), U-boats, (boats with kills:) U-88, U-251, U-255, U-334, U-355, U-376, U-456, U-457, U-703 33 torpedo aircraft, 6 bombers. (Flying over 200 sorties) | ||||||
| Casualties and losses | |||||||
|
24 merchant ships sunk, 153 merchant mariners killed | 5 aircraft | ||||||
PQ 17 was the code name for an Allied convoy in the Arctic Ocean during the Second World War. In July 1942, the Arctic convoys suffered severe losses when Convoy PQ 17 lost 24 of its 35 merchant ships during a series of heavy enemy daylight attacks which lasted a week.[2] The German success was possible through German signals intelligence (SIGINT) and cryptological analysis.[3] On 27 June, the ships sailed eastbound from Hvalfjord, Iceland for the port of Arkhangelsk, Soviet Union. The convoy was located by German forces on 1 July, after which it was shadowed continuously and attacked. The convoy's progress was being observed by the British Admiralty. First Sea Lord Admiral Dudley Pound, acting on information that German surface units, including the German battleship Tirpitz, were moving to intercept, ordered the covering force away from the convoy and told the convoy to scatter. However, due to vacillation by the German high command, the Tirpitz raid never materialised.[4][5] The convoy was the first joint Anglo-American naval operation under British command in the war.[6]
As the close escort and the covering cruiser forces withdrew westward to intercept the presumed German raiders, the individual merchant ships were left without their escorting destroyers.[7] In their ensuing attempts to reach the appointed Russian ports, the merchant ships were repeatedly attacked by Luftwaffe aeroplanes and U-boats. Of the initial 35 ships, only 11 reached their destination, delivering 70,000 short tons (64,000 t) of cargo.[8] The disastrous outcome of the convoy demonstrated the difficulty of passing adequate supplies through the Arctic, especially during the summer period of perpetual daylight.[9]
Background
With the entry of the Soviet Union in the war, the British and American governments agreed to send unconditional aid to their Soviet allies. The Beaverbrook-Harriman Anglo-American Mission visited Moscow in October 1941, agreeing to a series of munitions deliveries to the Soviet Union.[10] The most direct way to carry these supplies was by sea around the North Cape, through Arctic waters to the ports of Murmansk and Arkhangelsk.[11] The agreement stated that the Soviet government was responsible for receiving the supplies in Soviet ships at British or American ports. However, since there were not enough ships for the quantities of aid being sent by the Western allies to the Soviet Union, British and American ships began to constitute an increasing proportion of the convoy traffic.[12]
Although the defence of the Arctic convoys was the responsibility of the Royal Navy, Admiral Ernest King assigned Task Force 39 (TF 39) — built around the carrier USS Wasp and the battleship USS Washington — to support the British.[13]
The first convoy sailed from the United Kingdom in August 1941, two months after the German invasion of the Soviet Union. By the spring of 1942, twelve more convoys had made the passage with the loss of only one out of 103 ships.[2] From then on, the threat of attacks on the convoys increased, with the Germans preparing to stop the flow of supplies to the USSR with every means at their disposal, including the basing of heavy ships in Norway.[2] In 1941, the Kriegsmarine had already begun concentrating its strength in Norway in winter, both to prevent a repeated British attack, and to obstruct Allied supply lines to the Soviet Union. The battleship Tirpitz was moved to Trondheim in January, where she was joined by the pocket battleship Admiral Scheer and in March by the heavy cruiser Admiral Hipper.[14] Initial German dispositions had also directed battleships Scharnhorst and Gneisenau and the heavy cruiser Prinz Eugen to concentrate in Arctic waters, but these all fell victim to Allied air attacks, and had to turn back for repairs.[12] Moreover, the Germans had bases along the length of Norway, which meant, until escort carriers became available, Allied convoys had to be sailed through these areas without adequate defence against aircraft and submarine attack.[15]
Admiralty instructions and diversionary operations

British naval intelligence in June reported the Germans' intention to bring out major naval units to attack the next eastbound convoy, east of Bear Island.[14][16] Thus German forces would operate close to the Norwegian coast, with support of shore-based air reconnaissance and striking forces, with a screen of U-boats in the channels between Spitsbergen and Norway.[17] Allied covering forces, on the other hand, would be without air support, one thousand miles from their base, and with the destroyers too short on fuel to escort a damaged ship to harbour.[14]
To prevent such a situation, the Admiralty issued instructions on 27 June, which allowed the convoy to be turned back temporarily in order to shorten the distance to the nearest Allied base.[17] In the event, enemy surface movements took place later than expected, making these instructions unnecessary.[5] The Admiralty also instructed the safety of the convoy from surface attack to the westward of Bear Island depended on Allied surface forces, while to the eastward it was to be met by Allied submarines. Furthermore, the convoy's cruiser covering force was not to go east of Bear Island, unless the convoy was threatened by the presence of a surface force which the cruiser force could fight, nor to go beyond 25° East under any circumstance.[6][18]
A decoy convoy was also organised to divert enemy forces, consisting of the First Minelaying Squadron and four colliers, escorted by HMS Sirius and Curacoa, five destroyers and some trawlers. This diversionary force assembled at Scapa Flow for a week, sailing two days after the convoy.[19] German reconnaissance of Scapa during the period of assembly failed to notice the diversion, which was also not sighted on its passage. The operation was repeated on 1 July, again without success.[19] Additionally on 26 June the Admiralty took the opportunity to pass a westbound convoy QP 13, in conjunction with PQ 17. The former was made up of returning merchant ships from Arkhangelsk, with some ships leaving Murmansk.[19] It consisted of 35 ships and was escorted by five destroyers, three corvettes, one anti-aircraft ship, three minesweepers, two trawlers and, as far as the Bear Island area, one submarine. It was sighted by German aircraft on 30 June and 2 July. However, QP 13 was not attacked, since the German tactic was to concentrate on eastbound (laden) convoys,[19] rather than westbound convoys in ballast.
A fresh ice reconnaissance done on 3 July found the passage north of Bear Island had widened. The Admiralty suggested the convoy should pass at least 50 mi (80 km) north of it.[20] The senior officer of the escort (SOE), Commander J. E. Broome, preferred to stay in the low visibility on the original route, and to make ground to the eastward. Rear Admiral L. H. K. Hamilton, in command of the cruiser squadron, later decided that a more northerly route was necessary, ordered the SOE to alter the convoy's course to pass 70 miles (110 km) north of Bear Island and, later on to open to 400 mi (640 km) from Banak.[20]
Covering forces

The convoy's close escort was the First Escort Group (EG1), under Cdr. J Broome, and included six destroyers, 11 corvettes, minesweepers or armed trawlers and two anti-aircraft auxiliaries. The destroyers were HMS Keppel (SOE), Fury, Leamington, Ledbury, Offa and Wilton. The anti-aircraft auxiliaries were HMS Palomares and Pozarica. The other escorting ships were the corvettes HMS Lotus, Poppy, La Malouine and Dianella, the minesweepers HMS Halcyon, Salamander and Britomart, and the anti-submarine trawlers HMT Lord Middleton, Lord Austin, Ayrshire and Northern Gem.[21]
In a more distant covering role was the First Cruiser Squadron (CS1), under the command of Rear Admiral L. H. K. Hamilton, consisting of the British cruisers HMS London (flagship) and Norfolk, the American cruisers USS Wichita and Tuscaloosa, and four destroyers, of which two belonged to the United States Navy.
As further protection, the convoy was to be tracked at about 200 mi (320 km) by Home Fleet battleships.[22]
The second, heavy covering force, under the command of Admiral John Tovey, was made up of the British aircraft carrier Victorious, battleship Duke of York (flagship), cruisers Cumberland and Nigeria, the American battleship USS Washington, and nine destroyers.[23]
As the convoy began its preliminary movements, the covering forces planned by the Admiralty were moving to positions. Hamilton's First Cruiser Squadron left Seidisfjord in the night from 30 June-1 July.[19] It arrived in a covering position north of the convoy on 2 July. The cruisers were not sighted by the Germans until late on 3 July.[19]
The heavy cover force was shadowed for a short period while northeast of Iceland on 1 July, while the cruiser screen was refuelling at Seidisfiord. It was shadowed for a short period early on 3 July, while in a covering position south of the convoy.[19] Later that day, course was altered to the northward, to cross the convoy's track and to reach a position northwest of Bear Island. This would place Victorious within air striking range of the convoy on the morning of 4 July. This was calculated to occur at the same time at which a surface attack was expected to materialise. While en route to the new covering area, the task force was joined by HMS Manchester and Eclipse from Spitsbergen.[20]
Air reconnaissance of the Norwegian harbours had been hindered by weather, but information available showed German heavy units were probably moving northwards, and an air photograph of Trondheim late on 3 July confirmed Tirpitz and Hipper had sortied.[20] The flying boat patrol and the two lines of submarines between North Cape and Bear Island were being adjusted to cover the line of approach to the convoy as it moved eastwards. In view of the uncertainty of the two German ships' positions, Rear Admiral Hamilton decided to continue to provide close cover with the cruiser squadron and to pass east of Bear Island.[20]
Convoy movement, covering forces and escort
The convoy sailed from Hvalfjord on 27 June, under the command of Commodore John Dowding. In addition to the 34 merchant ships, an oiler (RFA Grey Ranger) for the escort, and three rescue ships (Rathlin, Zamalek and Zaafaran)[24] sailed with the convoy. The escort was made up of six destroyers, four corvettes, three minesweepers, four trawlers, two anti-aircraft ships and two submarines. The route was longer than earlier convoys, since the ice allowed for a passage north of Bear Island with an evasive detour in the Barents Sea. Moreover, all the convoy was bound for Arkhangelsk, because recent heavy air raids had destroyed most of Murmansk.[25] One ship suffered mechanical failure just out of port and was forced to turn back. Another, SS Exford, turned back after sustaining ice damage.[26]
Part of the convoy ran into drifting ice in thick weather of the Denmark Strait. Two merchant ships were damaged and had to turn back. Grey Ranger was also damaged,[27] her speed reduced to 8 kn (9.2 mph; 15 km/h), and since it was doubtful if she could face heavy weather, it was decided to transfer her to the fuelling position northeast of Jan Mayen in exchange for the RFA Aldersdale.[28]
Shortly after it entered the open sea, PQ 17 was sighted and tracked by U-456, and shadowed continuously except for a few short intervals in fog. This was augmented by Luftwaffe BV 138s on 1 July. On 2 July, the convoy sighted the returning convoy QP 13. It suffered its first air attack, by nine torpedo aircraft, later the same day. The planes were unsuccessful, one being shot down.[29] At 13:00 on 3 July, PQ 17's destroyer screen was steering east to pass between Bear Island and Spitsbergen.[30]
A solitary aircraft scored a torpedo hit on the morning of 4 July (the stricken merchantman, SS Christopher Newport, had to be scuttled by the escort) and there was an unsuccessful attack by six bombers in the evening.[31][32] USS Wainwright successfully broke up an air attack on the convoy the same day.[33] Later the same evening, another attack — by 25 torpedo bombers — took place, sinking SS William Hooper.[34] Two ships were now sunk, and at least four aircraft were shot down.[35]
'Convoy is to scatter'
| TIME | FROM | TO | MESSAGE |
|---|---|---|---|
| 21:11 | ADMY | CS1 | Cruiser Force withdraw to the westward at high speed. |
| 21:23 | ADMY | CS1 | Owing to threat from surface ships, convoy is to disperse and proceed to Russian ports. |
| 21:36 | ADMY | CS1 | Convoy is to scatter. |
At 12:30 on 4 July, the Admiralty gave Hamilton permission to proceed east of 25° east, should the situation demand, unless contrary orders were received from Admiral Tovey. This was a reversal of previous orders and as no information in Tovey's possession justified this change, Hamilton was ordered to withdraw when the convoy was east of 25° east or earlier at his discretion, unless the Admiralty assured him Tirpitz would not be met. At 18:58 the Admiralty informed Hamilton further information was expected shortly and instructed him to remain with the convoy pending further instructions.[36] At 21:11, the Admiralty sent a message prefixed "Most Immediate" ordering Hamilton to withdraw westwards at high speed.[35] This was due to U-boat information, a fact not shared with Hamilton. At 21:23, the Admiralty—in a message prefixed "Immediate"—ordered the convoy to disperse and proceed to Russian ports owing to threat from surface ships.[37] At 21:36, the Admiralty sent another "Most Immediate" message, ordering the convoy to scatter.[38][a]
Admiral Hamilton, Commander Broome and Commodore Dowding took these signals to indicate an attack by Tirpitz was imminent.[39] The convoy was immediately ordered to scatter, with the escorting destroyers ordered to join the cruiser force and the merchantmen to proceed independently.[40] The Admiralty's decision and orders would not have been so vehement had only British warships been concerned but the idea the first joint Anglo-American operation under British command might involve the destruction of American as well as British units may well have influenced the decisions of First Sea Lord Pound.[41] The Allied cruiser squadron was already beyond the standing orders set by the Admiralty and if no new orders had gone out, the cruisers would have had to withdraw some time afterwards in any case. The earlier cruiser movement did not influence the tactical situation but in light of later knowledge, the decision was deemed precipitate.[6]
Convoy losses

When the order to scatter the convoy was received, it had covered more than half of its route and lost three ships. The consequences for the merchantmen were dire, the ships were spread over a wide area, stripped of mutual protection and their trained escort. As the escort moved off to hunt for the suspected German surface force, messages on Merchant Navy wavelengths began to be received by the destroyers: "Am being bombed by a large number of planes", "On fire in the ice", "Abandoning ship", "Six U-boats approaching on the surface."[43] With the majority of the escorts ordered to return to Scapa Flow, only the close escort of anti-aircraft auxiliaries, corvettes, minesweepers and armed trawlers was left to protect the scattered ships. On 5 July, six merchantmen, including SS Fairfield City and SS Daniel Morgan, were sunk by the Luftwaffe and six more by four U-boats. Among the losses that day were SS Pan Kraft, Washington, Carlton, Honomu, the Commodore's flagship River Afton, Empire Byron and Peter Kerr (Kerr was abandoned after a fire got out of control.)[44] Commodore Dowding's refusal to accept defeat contributed to the rescue of most of the ships that eventually survived the convoy.[45] SS Paulus Potter had been abandoned by her crew after an aerial attack on 5 July; the ship was boarded by sailors from U-255 on 13 July; after taking the ship's documents and flag, Kptlt. Reche sank the Potter with a torpedo.[46]
On 6 July, SS Pan Atlantic was sunk by the Luftwaffe and SS John Witherspoon by U-255. On 7–8 July, five more ships were sunk (two by U-255), including SS Olapana and SS Alcoa Ranger. The remaining escort withdrew into the Arctic Ocean on 9 July but the merchant ships suffered no more that day. The last losses were SS Hoosier and SS El Capitan on 10 July. The Luftwaffe flew over 200 sorties and lost only five aircraft in exchange for the eight merchantmen.[47]
On receiving the third order to scatter on 4 July 1942, RNVR T/Lt Leo Gradwell commanding the ASW adapted 575 long tons (584 t) Middlesbrough-built trawler HMS Ayrshire (FY 225), concluded that as he was heading north to the Arctic ice shelf, nothing prevented him from escorting merchantmen.[48] Leading his convoy of Ayrshire and three US merchant vessels, the Panamanian-registered Troubador, Ironclad and Silver Sword, he proceeded north, using only a sextant and The Times World Geographic Pocket Book.[49] On reaching the Arctic ice pack, the convoy stuck fast and so the ships stopped engines and then banked their fires.[49] Gradwell arranged a defence, formulated around the fact that Troubador was carrying a cargo of bunkering coal and drums of white paint: the crews painted all the vessels white; covered decks with white linen; and arranged the Sherman tanks on the merchant vessels decks into a defensive formation, with loaded main guns.[50] After a period of waiting and having evaded Luftwaffe reconnaissance aircraft, finding themselves unstuck, they proceeded to the Matochkin Strait.[51] They were found there by a flotilla of corvettes, who escorted the four-ship convoy plus two other merchant vessels to the Russian port of Archangel, arriving on 25 July.[51][52] Gradwell was awarded the Distinguished Service Cross on 15 September 1942.[52][53]
In the voyage to the Russian ports, some of the ships and lifeboat craft took refuge along the frozen coast of Novaya Zemlya, landing at Matochkin.[54] The Soviet tanker Azerbaijan had lost her cargo of linseed oil and much of SS Winston-Salem's cargo had been jettisoned in Novaya Zemlya.[55]
Many of the ships' locations were unknown, in spite of searches by Coastal Command aircraft, which had proceeded to north Russia after their patrols, and by minesweepers and corvettes in the waters. A fortnight elapsed before the results of these attacks and the fate of the various ships of the convoy were fully known.[6] Of the 34 ships which had left Iceland, 23 were sunk and 11 made port. Two British, four American, one Panamanian and two Russian merchant ships reached Arkhangelsk. Two American ships, the SS Samuel Chase and Benjamin Harrison, docked at Murmansk.[56] The total deliveries amounted to 70,000 short tons (64,000 t) out of the 200,000 short tons (180,000 t) which had started from Iceland.[8]
Aftermath
Prime Minister Winston Churchill called the event, "one of the most melancholy naval episodes in the whole of the war."[8] An inquiry assigned no blame to anyone, since orders were issued by the First Sea Lord.[57] The Soviet Union did not believe so many ships could be lost in one convoy and openly accused the Western Allies of lying. Despite the help provided by the material delivered, PQ 17 actually worsened Soviet-Allied relations over the short term, with the Soviets never acknowledging the efforts of Allied merchant seaman or sailors in either navy.[58] Joseph Stalin, and Soviet naval experts, found it difficult to understand the order to scatter given by the Admiralty, given "that the escorting vessels of the PQ 17 should return, whereas the cargo boats should disperse and try to reach the Soviet ports one by one without any protection at all."[59] Admiral King, already known to distrust the British, was furious with what he perceived as Admiral Pound's bungling and promptly withdrew TF 39, sending it to the Pacific. He hesitated to conduct further joint operations under British command.[60] Admiral Dan Gallery, USN, serving in Iceland at that time, called PQ 17 "a shameful page in naval history".[61]
In view of PQ 17, the Admiralty proposed to suspend the Arctic convoys at least until the ice receded and perpetual daylight passed.[57] At a conference with Hitler, Kriegsmarine Commander-in-Chief Admiral Raeder stated, "...our submarines and aircraft, which totally destroyed the last convoy, have forced the enemy to give up this route temporarily..."[62] At a meeting with the head of the Soviet Military Mission, Admiral Harlamov and the Soviet ambassador in London, Ivan Maisky, the Soviets requested to know the scheduled departure of PQ 18. Pound said nothing could be done until better Russian air cover was arranged, after which Harlamov criticised the order to withdraw the cruisers from PQ 17. Pound was furious, and deeply resented the Russian attitude. Pound angrily admitted that PQ 17 was scattered by his personal order while Maisky stated that "even British admirals make mistakes".[63]
It was not until September that another convoy set out for North Russia. The convoy's defence scheme was revised, with a very strong constant close escort of sixteen destroyers and the first of the new escort carriers, HMS Avenger, herself equipped with twelve fighters.[64] After the war there was criticism of this incident, both from American and Soviet sources.[64] Soviet historians give varying reasons for the suspension and reduction in supply caused by the halt in the Arctic convoys. Some considered it the result of "the fact that in 1942, Anglo-American (ocean) communications were destroyed."[65]
At least sixteen officers and men of the Merchant Navy were honoured for gallantry or distinguished service for the actions in the convoy. A supplement to the London Gazette published on 6 October 1942 carried notification of two George Medals, six appointments to various grades of the Order of the British Empire, six British Empire Medals and two King's Commendation for Brave Conduct.[66]
In December 2012 the Arctic Star medal was created and on 19 March 2013 the first medals were presented to approximately 40 veterans, in London.[67][68]
In popular culture
- HMS Ulysses (1955), a novel written by Alistair MacLean, who served on HMS Royalist on Arctic convoys and against German battleship Tirpitz.
- The Captain, a 1967 novel based on the experiences of this convoy by Dutch writer Jan de Hartog, also translated into Dutch as De kapitein.
- Requiem for Convoy PQ-17, a novel by Valentin Pikul is dedicated to the fate of the convoy. The book is also interesting since it describes the Soviet belief that Soviet submarine K-21 hit the Tirpitz. From 2003–04, a film was released in Russia based on this book.
- Convoy PQ-17 is a requiem for orchestra, dancers and choir based on the events surrounding the sinkings, composed by Canadian composer Christopher Butterfield, which received its world premiere in St. Petersburg, Russia, in 2001. It has been performed three times, in 2001, 2002 and 2013 by the Victoria Symphony and a second time in Russia. The dance elements were created and performed by Coleman, Lemieux & Compagnie. The dance company's co-founder, Bill Coleman, wanted to honour his father, who was a merchant mariner stationed in Russia during the Second World War and is one of the principal dancers in the production.[69]
- In January 2014, the hour-long BBC Two documentary PQ17: An Arctic Convoy Disaster, written and narrated by Jeremy Clarkson, retold the story of the convoy with first-hand testimony from the men who served.[70]
See also
Notes
a. ^ This latter signal was intended merely as a correction of technical wording from "disperse" to "scatter", but this was not known at the time. The order to scatter was only used under immediate threat of surface attack. Detailed instructions in each ship's signal book laid down the actions that were to be taken by each ship on receipt of this order.[5]
Citations
- ↑ Schofield p77-78
- 1 2 3 London Gazette, Friday, 13 October 1950, p. 5139
- ↑ Albert Praun, German Radio Intelligence
- ↑ Patrick Beesly, "Convoy PQ 17: A Study of Intelligence and Decision-Making," Intelligence & National Security (1990) 5#2 pp 292-322
- 1 2 3 4 Churchill, The Second World War, Volume IV, p. 235
- 1 2 3 4 Churchill, The Second World War, Volume IV, p. 236
- ↑ Hill, Destroyer Captain, pp. 45–46
- 1 2 3 Churchill, The Second World War, Volume IV, p. 237
- ↑ Churchill, The Second World War, Volume IV, p. 240
- ↑ Langer, The Harriman-Beaverbrook Mission and the Debate over Unconditional Aid for the Soviet Union, 1941, pp. 463–482
- ↑ Churchill, The Second World War, Volume IV, p. 228
- 1 2 Churchill, The Second World War, Volume IV, p. 229
- ↑ Miller, War at Sea: A Naval History of World War II, p. 309
- 1 2 3 London Gazette, Friday, 13 October 1950, p. 5140
- ↑ Hill, Destroyer Captain, p. 26
- ↑ Winton, Ultra at sea, p. 61
- 1 2 London Gazette, Friday, 13 October 1950, p. 5143
- ↑ London Gazette, Friday, 13 October 1950, pp. 5144–5145
- 1 2 3 4 5 6 7 London Gazette, Friday, 13 October 1950, p. 5145
- 1 2 3 4 5 London Gazette, Friday, 13 October 1950, p. 5146
- ↑ Admiralty, ADM 199/427: HOME FLEET DESTROYER COMMAND - April to December 1942, HMSO
- ↑ Churchill, The Second World War, Volume IV, p. 234
- ↑ Wilton, Ultra at sea, p. 62
- ↑ Turner, Fight for the sea: naval adventures from World War II, p. 103
- ↑ Connell, Arctic destroyers: the 17th Flotilla, p. 80
- ↑ NMHS, Sea history, Issues 61-68, p. 58
- ↑ Hill, Destroyer Captain, p. 29
- ↑ Hill, Destroyer Captain, p. 37
- ↑ Hill, Destroyer Captain, p. 39
- ↑ Hill, Destroyer Captain, p. 41
- ↑ Turner, Fight for the sea: naval adventures from World War II, p. 105
- ↑ Hill, Destroyer Captain, p. 42
- ↑ Turner, Fight for the sea: naval adventures from World War II, p. 110
- ↑ Turner, Fight for the sea: naval adventures from World War II, p. 106
- 1 2 Hill, Destroyer Captain, p. 43
- ↑ Hinsley, Eastaway Thomas, British intelligence in the Second World War, pp. 213–214
- ↑ Hill, Destroyer Captain, p. 44
- ↑ Hinsley, Eastaway Thomas, British intelligence in the Second World War, pp. 216–219
- ↑ Hill, Destroyer Captain, p. 45
- ↑ Hill, Destroyer Captain, p. 50
- ↑ Churchill, The Second World War, Volume IV, pp. 235–236
- ↑ Helgason, Guðmundur. "SS Paulus Potter". German U-boats of WWII - uboat.net.
- ↑ Hill, Destroyer Captain, p. 48
- ↑ Moore, A careless word-- a needless sinking, p. 220
- ↑ Connell, Arctic destroyers: the 17th Flotilla, p. 101
- ↑ Wynn, U-boat Operations of the Second World War, p. 178
- ↑ Helgason, Guðmundur. "PQ-17 The Greatest Convoy Disaster". German U-boats of WWII - uboat.net. Retrieved 2009-04-16.
- ↑ "AYRSHIRE H113". Hull Trawler. Retrieved 2 January 2014.
- 1 2 Richard Woodman (1994). Arctic Convoys 1941-1945.
- ↑ James Delingpole (14 December 2013). "Jeremy Clarkson brings Yuletide joy to the Delingpole household". The Spectator. Retrieved 2 January 2014.
- 1 2 John Beardmore. "The PQ17 Story - The Worst Journey in the World". CBRNP.com. Retrieved 2 January 2014.
- 1 2 "Obituary - Leo Gradwell". Catholic Herald. 14 November 1969. Retrieved 2 January 2014.
- ↑ Helgason, Guðmundur. "Leo Joseph Anthony Gradwell DSC, RNVR". German U-boats of WWII - uboat.net. Retrieved 2 January 2014.
- ↑ Riesenberg, Sea War, Part 773., p. 320
- ↑ Morison, History of United States Naval Operations in World War II, p. 187
- ↑ Bunker, Liberty ships: the ugly ducklings of World War II, p. 67
- 1 2 Churchill, The Second World War, Volume IV, p. 238
- ↑ Denkhaus, Richard A. (February 1997). "World War II: Convoy PQ-17". Retrieved 2009-04-16.
- ↑ Wykes, 1942, The Turning Point, p. 107
- ↑ Miller, War at Sea: A Naval History of World War II, p. 312
- ↑ Gallery, Eight Bells and All's Well, p. 133
- ↑ Churchill, The Second World War, Volume IV, p. 243
- ↑ Hawkins; Deighton, Destroyer, p. 176
- 1 2 Churchill, The Second World War, Volume IV, p. 244
- ↑ Howarth, The Battle of the Atlantic 1939-1945, p. 554
- ↑ See "Piece details T 335/47—Merchant Navy Awards (Awards for convoy PQ 17): London Gazette 6 October 1942", The Catalogue, The National Archives, retrieved 16 April 2010 and The London Gazette: (Supplement) no. 35732. pp. 4349–4350. 2 October 1942. Retrieved 16 April 2010.
- ↑ Duell, Mark (19 March 2013). "David Cameron pays tribute to British Navy heroes who took supplies to Russia in Second World War". Daily Mail. Retrieved 19 March 2013.
- ↑ Bannister, Sam (19 March 2013). "Veterans presented with their Arctic Star medals in London". The News. Retrieved 19 March 2013.
- ↑ Retrieved 11 November 2013.
- ↑ "PQ17: An Arctic Convoy Disaster". bbc.co.uk. 2 January 2014. Retrieved 2 January 2014.
References
- Home Fleet Destroyer Command, April to June 1942. Admiralty War Diaries. ADM 199/427. HMSO. Retrieved 31 July 2015.
- Home Fleet Destroyer Command, July to September 1942. Admiralty War Diaries. ADM 199/427. HMSO. Retrieved 31 July 2015.
- Beesly, Patrick (1990). Convoy PQ 17: A Study of Intelligence and Decision-Making. Intelligence & National Security. 5. London: Frank Cass. pp. 292–322. doi:10.1080/02684529008432054. ISSN 1743-9019.
- Bunker, John (1972). Liberty ships: The ugly ducklings of World War II. Naval Institute Press. ISBN 978-0-87021-340-3.
- Churchill, Winston S. (1951). The Hinge of Fate. The Second World War:. IV. Cassell. OCLC 153203701.
- Connell, G. G. (1982). Arctic destroyers: the 17th Flotilla. W. Kimber. ISBN 978-0-7183-0428-7.
- Hawkins, Ian; Deighton, Len (2003). Destroyer: An anthology of first-hand accounts of the war at sea, 1939–1945. Conway Maritime Press. ISBN 978-0-85177-947-8.
- Hill, Roger P. (1986). Destroyer Captain. Periscope. ISBN 1-904381-25-1.
- Hinsley F. H., Francis; Eastaway Thomas, Edward (1990). British intelligence in the Second World War: its influence on strategy and operations. II. London: HMSO. ISBN 978-0-11-630934-1.
- Howarth, Stephen (1994). The Battle of the Atlantic 1939–1945: the 50th anniversary International Naval Conference. Greenhill. ISBN 978-1-55750-058-8.
- Langer, John D. (1979). "The Harriman-Beaverbrook Mission and the Debate over Unconditional Aid for the Soviet Union, 1941". Journal of Contemporary History. London: Sage. ISSN 0022-0094.
- Miller, Nathan (1997). War at Sea: A Naval History of World War II. Oxford University Press US. ISBN 978-0-19-511038-8.
- Moore, Arthur R. (1984). "A careless word...a needless sinking": a history of the staggering losses suffered by the U.S. Merchant Marine, both in ships and personnel during World War II. Kings Point, NY: American Merchant Marine Museum. OCLC 475918989.
- Morison, Samuel E. (2001). History of United States Naval Operations in World War II: The Battle of the Atlantic, September 1939 – May 1943. History of United States Naval Operations in World War II. I. University of Illinois Press. ISBN 978-0-252-06963-5.
- NMHS (1992). Sea History. National Maritime Historical Society.
- Riesenberg, Felix (1956). Sea War. New York: Rinehart. OCLC 1263591.
- Schofield, Bernard (1964). The Russian Convoys. London: B. T. Batsford. OCLC 862623.
- The Bookseller. Authors Publishers' Association, Booksellers Association of Great Britain and Ireland. 1971. ISBN 978-0-340-12512-0.
- The London Gazette: (Supplement) no. 39041. pp. 5139–5145. 17 October 1950.
- Frayn Turner, John (2002). Fight for the sea: naval adventures from World War II. Naval Institute Press. ISBN 978-1-55750-884-3.
- Winton, John (1988). Ultra at sea. Leo Cooper. ISBN 0-85052-883-6.
- Wykes, Alan (1972). 1942, The Turning Point. Macdonald. ISBN 978-0-356-03969-5.
- Wynn, Kenneth G. (1997). U-boat Operations of the Second World War: Career histories, U1-U510. Chatham. ISBN 978-1-55750-860-7.
Further reading
- Ransome Wallis, R. (1973). Two Red Stripes. London: Ian Allen. ISBN 0-7110-0461-7.
External links
- U.S. Naval Historical Center account of PQ-17
- Description of Rösselsprung
- The Requiem on Convoy PQ-17, Russian novel by Valentin Pikul
- Memoirs of Chief Steward Horace Carswell DSM, MM, BEM during Convoy PQ.17
- Coxswain Sid Kerslake of armed trawler "Northern Gem" in PQ.17
- Convoy PQ.17, a primary source diary and supporting material by Jack Bowman, ERA aboard HMS La Malouine.
- PQ 17 at Convoyweb
- Helgason, Guðmundur. "PQ 17". German U-boats of WWII - uboat.net.